Showing posts with label 1 addition many ways. Show all posts

Jan 27, 2014

1 ADDITION,MANY WAYS- The Simple Black Abaya

The simple Black Abaya- 6 ways
1.   POP OF COLOUR


2.   ALL BLACK


3.   STATEMENT


4.   CHILLED OUT


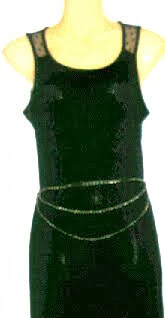
5.   BELTED


6.   WILD CARD


Jan 6, 2014

1 Addition, Many Ways- Usamimi Headband

One little addition and four different ways to wear it.

The usamimi headband is not just for bunny ears.


Wear it on the head

On the Arm

Around the Waist

Around the Neck

Nov 27, 2013

1 Addition, Many Ways Bobby Pins & Ribbon


All you need is some bobby pins, gold spray paint and some ribbon


Spray paint the bobby pins, clip them onto a ribbon and use as a Pharaoh necklace or as a belt.


Remove the bobby pins from the ribbon and add some gold to the hair.


Oct 28, 2013

1 Addition, Many Ways- A Strip Of Fabric

If you are anything like me, you must be having pieces of fabric laying around everywhere.

Here's a little project to make use of all the scrap pieces.

Tidy up the edges and you have:
1. A wide tie to adorn shirts or boring necklines.
2. A fabric belt
3. A hair band
4. Fabric corsage

Ps. Make sure your strip is a double layer.

Sep 25, 2013

1 ADDITION, MANY WAYS- A Belt Again

I am still really into chains. They make for a great accessory.
This months 1 Addition, Many Ways is a belt inspired by DSquared2's Resort Collection 2013.
Dsquared2 is one of my absolute fav brands! Their designs are always so funky and fresh.

The materials for this project are very similar to those of the Body necklace http://goo.gl/mKYhQL I made 2 months back.

What You Need:
•Pliers
•2m of chain
•chain clasp
•measuring tape
•side cutters


Steps:
1. Measure your waist. Cut a chain accordingly. If you want an extra side piece, cut a little extra.
2. Add a chain clasp on the one end.
3. Place around your waist. Add a ring where the clasp meets the chain.
4. Now add the additional chains in the lengths you prefer. Add them on the one side to the ring that the chain clasp is on. Attach on the other side with an additional ring.

Aug 21, 2013

1 ADDITION, MANY WAYS-CLIPPED!

When I think of clip on earnings I think of big shiny old glamour style. Maybe its because I own one of them. One I got from my granny. They beautiful, but far too painful to wear for too long. Its such a pity I thought until now.

Clip on earring's are not only for the ears, they are also great for bedazzling bleh looking shoes and clothing!

Bold pieces are so in right now!

Attach to:
1. Shirt collars
2. Plain pumps
3. Elastic, and use as
- a belt, or
- a hair band
4. Head scarf (use light in weight earrings for this.)
5. Hair, as hair clips

Have fun and be creative

Jul 30, 2013

1 ADDITION, MANY WAYS- Chained It- "Body-Neck-Lace"

Here goes, as promised. The new feature!

This one adds an instant Glamification.
For this DIY you need to make a trip to a hardware store.

Things you need:
• Pliers
• 3m of chain
• Chain clasp
• Measuring tape (not shown in pic)
• Side cutter

I apologize if these descriptions are confusing, but in all honesty, I confused myself so many times while making this piece.

Steps:
1. Measure the length around your neck. Next measure the length from beneath your chest up over your shoulder, under your arm. Cut the pieces using a side cutter.
2. Neck piece: Using the pliers open the last hook and insert the chain clasp. This makes a necklace.
3. Place the neck piece and shoulder piece next to each other.
4. Find the mid-point on the neck piece. Attach a piece of chain from the midpoint of the neck piece to the bottom end of the shoulder piece.
5. I inserted a stud earring in the last ring of the shoulder piece, to ensure that I didn't loose my place and to lessen the confusion a bit.
6. This step is easiest done while wearing the piece. Put on the neck piece as you would any other necklace. Position the shoulder piece on your body. Throw the excess chain over your shoulder.
6.1. Mark off where the shoulder piece chain meets your shoulder.
6.2. Measure the length on your shoulder from the neck piece to the shoulder piece.
7. Now add in other pieces.
8. The last part. Again I would suggest wearing the piece for this step. Put on your almost complete Body-Neck-Lace. Take the hanging pieces over your shoulder, pull it out under your arm. Look at where it meets the front piece and attach! You now have an arm hoop.

Tada, there you go. Completed Body-Neck-Lace.

Phew! This took me a while but it was so worth it.

I highly recommend using pliers at all times!!! (I didn't and was left with aching fingers and chipped nails.)

*Hijabi's--- some eid inspo. The price and rate at which abaya's go out of style is just insane! So why not make your own?